
Terminal rendering
meshio++ can draw a mesh where no window, browser or GPU is available: an SSH session on a cluster login node, a container, a CI log, a terminal with nothing else installed. A software rasterizer turns the mesh into pixels, and the pixels become Unicode block characters with terminal colours, an HTML page, an asciinema recording or a PNG.
meshioplusplus snapshot part.vtu -                          # draw it in this terminal
meshioplusplus snapshot part.vtu part.png --edges feature   # a PNG, no display needed
meshioplusplus snapshot result.vtu - --color-by temperature --colorbar --cmap turbo
meshioplusplus tui part.vtu # orbit, zoom and pan it right hereimport meshioplusplus as mio
mesh = mio.read("part.vtu")
print(mio.render_text(mesh, color_by="temperature")) # ANSI text for this terminal
image = mio.render_image(mesh, 800, 600, supersample=2) # an (H, W, 4) uint8 array
mio.snapshot(mesh, "part.png", edges="all") # .png, .txt, .ansi, .html or .cast
mio.tui(mesh) # the interactive viewerIt is a preview, not a replacement for the interactive viewers: no GPU lighting, transparency or picking. What it offers instead is that it runs anywhere the core runs — the release binaries included, since it needs no OpenGL and vendors nothing — and that its output is reproducible to the byte.
What is drawn
The rasterizer draws what the SVG writer draws, but resolves visibility per pixel with a depth buffer instead of sorting whole faces, so faces that intersect or overlap come out right:
- 2-D cells as they are (triangles, quads, polygons, and the corners of their higher-order variants);
- volume cells, polyhedra included, through their boundary skin (
extract_skin); cell data reaches the skin through"surface:parent_cell", as in the SVG writer; linecells as lines, andvertexcells — or every point of a mesh with no cells — as discs.
A volume mesh that also carries its own boundary faces draws both; where they coincide, the skin wins the depth tie. A quad is split on its shorter diagonal and a polygon is fanned from its first corner, so a warped quad shades the same way every time.
Outputs
| Form | How | Notes |
|---|---|---|
| this terminal | snapshot IN -, render_text() | sized to the terminal; ANSI colour escapes |
.ansi | snapshot IN out.ansi | the same text in a file, for cat |
.txt | snapshot IN out.txt | glyphs only, no escape sequence |
.html | snapshot IN out.html | a self-contained page holding a <pre> of coloured spans |
.cast | snapshot IN out.cast | an asciicast v2 orbit around the mesh, for asciinema play |
.png | snapshot IN out.png, encode_png() | RGBA, with no dependency |
| an array | render_image() | (H, W, 4) uint8, plus an optional id buffer |
These are renderings, not mesh files: they are not in the format registry, write() does not produce them, and the conformance matrix does not apply.
The PNG writer stores its image data in uncompressed deflate blocks with its own CRC-32 and Adler-32, so it needs no zlib and writes the same bytes on every platform. --png-compress 1..9 (png_compress= in Python) compresses through zlib instead, where the build has it; the result is smaller but can differ between zlib versions.
A .cast recording sweeps the azimuth through --cast-degrees (360 by default) in --cast-frames frames (36), stamped at --cast-fps (12) frames per second. The timestamps come from the frame index, never the clock, so the file is reproducible.
Cell encodings
A terminal cell holds one character in one foreground and one background colour. Each encoding splits a cell into a grid of pixels and, for every cell, picks the split of its pixels into two colour groups with the least squared error, ties broken by a fixed order, then the character that draws that split:
--encoding | pixels per cell | characters | best for |
|---|---|---|---|
halfblock (default) | 1 x 2 | ▀ ▄ █ | colour fields: square pixels, two colours per cell |
quadrant | 2 x 2 | ▘ ▝ ▖ ▗ ▚ ▞ ▙ ▟ … | more shape detail |
sextant | 2 x 3 | U+1FB00–U+1FB3B (Unicode 13) | finer shape; needs a recent font |
braille | 2 x 4 | U+2800–U+28FF | line work, wireframes |
ascii | 1 x 1 | .:-=+*#%@ by luminance | anything that cannot print Unicode |
Transparent pixels (the default background) leave the terminal's own background showing: a cell with nothing drawn is a space with no colour at all.
--color-depth picks the colours: truecolor (24-bit), 256 (the xterm palette, nearest colour, no dithering), 16 (the ANSI colours) or mono (no colour: a pixel is drawn when it is bright). auto, the default when drawing to the terminal, reads the environment: NO_COLOR set to anything gives mono (see no-color.org); COLORTERM=truecolor or 24bit gives truecolor; a TERM containing 256color gives 256; TERM=dumb gives mono; anything else gives 16. On Windows, Windows Terminal (WT_SESSION) counts as 24-bit. Files default to truecolor.
Cells are assumed to be twice as tall as they are wide; --cell-aspect overrides it. When the terminal reports its size in pixels (ws_xpixel/ws_ypixel), the native CLI uses the real aspect.
Graphics protocols
Some terminals can show real images. --encoding kitty uses the Kitty graphics protocol (raw RGBA, base64 in 4096-byte chunks), iterm2 the iTerm2 inline images protocol (a PNG), and sixel DEC Sixel graphics with a 256-colour palette from a deterministic median cut. They are used only when asked for — a terminal's TERM does not say reliably whether it supports them — and the image is sized from the cell count and the cell's pixel size.
Inside tmux the sequences have to be wrapped in tmux's passthrough, which since tmux 3.3 also needs set -g allow-passthrough on (tmux FAQ). snapshot refuses a graphics protocol inside tmux unless --tmux asks for the wrapping; the cell encodings need none of this.
Camera, shading and overlays
| Option (CLI / Python) | Default | Meaning |
|---|---|---|
--view / view | — | iso, +x, -x, +y, -y, +z, -z: the camera sits on that side and looks at the mesh |
--azimuth, --elevation, --roll | 45, 35.26, 0 | the camera direction in degrees, the SVG writer's convention (the defaults are the isometric view) |
--perspective / projection="perspective" | orthographic | a pinhole camera, with --fov (30°) vertical field of view |
--zoom, --pan-x, --pan-y / zoom, pan | 1, 0, 0 | magnify the fitted view; shift it by a fraction of the frame |
--shading / shading | flat | none (unlit), flat (one Lambert term per face) or smooth (normals from compute_normals, split at --split-angle, 30°) |
--one-sided / two_sided=False | two-sided | leave back faces at the ambient level instead of lighting both sides |
--ambient / ambient | 0.25 | the fraction of its colour a face turned away from the light keeps |
light_dir | (0, 0, 1) | direction toward the light in camera space; the default is a headlight |
--edges / edges | none | all element edges, or the feature edges of feature_edges (sharp at --feature-angle, open and non-manifold) |
--supersample / supersample | 1 | 2 or 4 samples per pixel along each axis, averaged by a box filter |
--axes, --scale-bar | off | the world axes (x red, y green, z blue) in the lower left; a 1-2-5 scale bar in the lower right (orthographic only) |
--fill, --line-color, --edge-color, --background | #c8c5bd, #000080, #000000, none | colours as #rrggbb, #rrggbbaa or none (transparent); Python takes (r, g, b[, a]) tuples |
The camera is fitted to the geometry actually drawn, not to the whole bounding box of the points. Shading multiplies the face colour (the fill or the mapped field) and never replaces it.
Colouring by data
The --color-by family of convert works the same way here: --color-by NAME (point data first, then cell data), --component, --cmap, --vmin, --vmax, --nan-color and --colorbar. Point data colours a face by the mean of its corners, cell data by the owning cell, and non-finite values take --nan-color. The automatic range spans every face handed to the rasterizer, hidden ones included, so an orbit never changes the colours. The range is printed under a text rendering (--no-notes turns that off) and returned by render_image(..., return_info=True).
The colormaps are viridis (the default), coolwarm, turbo, magma, inferno, plasma, grey and synthwave, and a reversed _r variant of each. synthwave runs from deep blue through violet and magenta to hot pink and pale cyan; it is an original palette, not perceptually uniform, and is for the theme, not for anything quantitative. They are shared with the SVG, TikZ and glTF writers. viridis, magma, inferno and plasma are matplotlib's listed maps (CC0); Turbo is Apache-2.0 (Google LLC); coolwarm and grey are sampled from matplotlib.
Field rendering
These options (v16.34.0) turn a picture of a surface into a picture of a solution. Each is a flag of snapshot and a keyword argument of the same name in every language (see surfaces).
| Option (CLI / Python) | Meaning |
|---|---|
--expr TEXT / expr | colour by a data_calc expression ("mag(u) / max(p)"), evaluated on the fly: operands are point data, then cell data, so no intermediate file is written |
--reduce NAME / reduce | colour a six- or nine-component tensor array by mises, hydrostatic or principal (with --component 0, 1, 2 the smallest, middle and largest, the largest by default), as tensor_invariants computes them |
--clip LOW,HIGH / clip=(low, high) | bound the automatic range by percentiles of the drawn values, so one outlier does not flatten the plot; either end may be left empty (--clip 2,); an explicit --vmin/--vmax wins |
--symmetric / symmetric | make the automatic range symmetric about zero, so a diverging map such as coolwarm puts zero at its midpoint |
--scale linear|log|symlog, --scale-threshold T / scale, scale_threshold | the colormap position of a value: proportional, proportional to its logarithm (a value that is not positive is drawn in --nan-color, and a range that is not positive is an error), or a signed logarithm that is linear within T of zero |
--colorbar | a gradient bar with tick marks; the tick values and the range are also in the notes under a text picture, and a count of values with no finite value on the scale says so |
--categorical | treat the integer array of --color-by (a material id) as categories, coloured from a fixed qualitative palette, with a key in the notes |
--color-regions | colour cells by the first named cell region that holds them (regions in their sorted order), with a key listing each name, colour and cell count; an empty region still appears in the key |
--category-edges | draw the edges where two faces of different category meet (categories, regions or a flag diagnostic) |
--isolines N, --iso-levels A,B,..., --iso-color / isolines, iso_levels, iso_color | contour lines of the point array --color-by: N equally spaced levels inside the range, or the explicit levels, drawn with a depth bias so they sit on their faces; cell data are refused by name |
--vectors NAME, --vector-count N, --vector-length L, --vector-color / vectors, ... | arrows for a vector point array at about N evenly ranked drawn points; the longest is 6% of the model's diagonal, or every arrow is L model units long; the heads lie in the plane of the arrow and the line of sight |
--streamlines NAME, --stream-seeds N, --stream-length L, --stream-color / streamlines, ... | lines that follow a vector point array, below |
--warp NAME, --warp-scale S, --warp-outline, --outline-color / warp, ... | move the points by a displacement point array times S, optionally drawing the undeformed outline (its open and sharp edges) beside the deformed shape |
--diagnostic NAME, --quality-metric M / diagnostic, quality_metric | one flag for the checks people run first, below |
The diagnostics reuse metrics that already exist; none is a new algorithm:
--diagnostic | Draws |
|---|---|
quality | cells coloured by the quality metric --quality-metric names (scaled_jacobian, aspect_ratio, ...) |
inverted, degenerate | cells with a negative signed volume or area, or a near-zero volume, edge or Jacobian, in red; the notes count the faces |
orientation | front faces (towards the camera) in blue and back faces in orange, so a flipped patch is visible at once |
free-edges | open edges in orange, non-manifold edges in red and inconsistently wound pairs in magenta, from the repair detectors |
edge-length | faces coloured by their mean edge length |
A diagnostic excludes --color-by, --expr and --color-regions; the options that make no sense together are refused by name rather than ignored. With none of the new options set a frame is byte-identical to v16.33.0's.
Streamlines
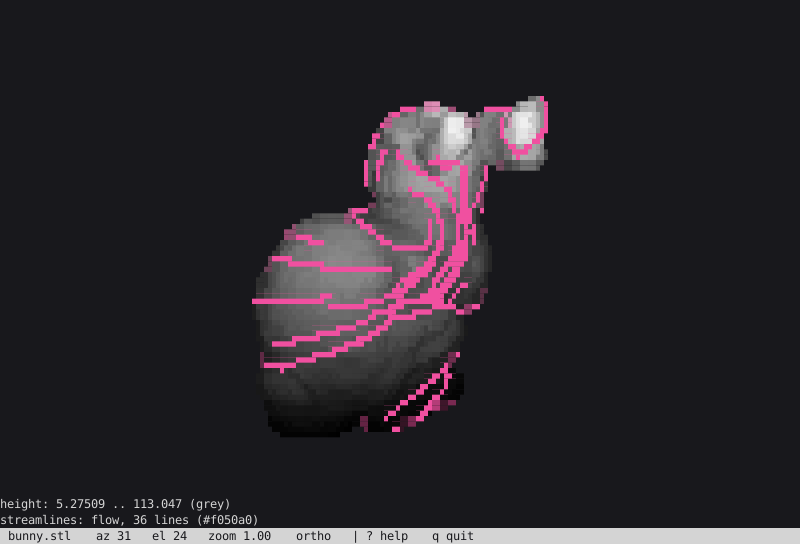
A spiral flow about the bunny's vertical axis, 36 streamlines at --stream-length 0.2, in a terminal 100 columns wide with the sextant encoding. The lines are drawn on the surface, wrap behind the model and are hidden by it, as any other geometry is.
--streamlines NAME (v16.37.0) follows the vector point array NAME from a set of seeds, in both directions, and draws the lines like isolines and arrows (a depth bias keeps them on their faces). The field is the piecewise-linear interpolation of the array over the mesh's own cells, so a linear field is followed exactly: triangles, quads (two triangles), tetrahedra, hexahedra (six), wedges (three) and pyramids (two); a higher-order cell contributes its corner nodes, and a mesh with no cell of these kinds is refused by naming the types it has. The dimension of the highest cells found decides where the lines run: a volume is traced through its volume, a surface on the surface (the field is projected onto the triangle it is on, and the point stays on it), so a flow over a shell winds around it.
| Option | Meaning |
|---|---|
--stream-seeds N | about this many lines (default 40; 1 to 10000, and never more than there are simplices). The seeds are the centroids of simplices ranked at equal area or volume along a golden-ratio sequence, so they spread evenly over a structured mesh instead of lining up with its rows |
--stream-length L | the longest a line grows in each direction from its seed, in diagonals of the box around the traced cells (default 0.5; (0, 10]) |
--stream-color | the colour of the lines (default #f050a0) |
A line stops where it leaves the mesh, where the field vanishes (a speed under a billionth of the fastest) or when its length is used up. The integrator is fixed-step RK4 in arc length with a step of 0.5% of the diagonal, so a line has at most L / 0.005 segments each way (100 by default, never more than 2000), and a result depends only on the mesh and the arguments: the point locator is a uniform bucket grid filled in simplex order, the lines are traced in parallel into per-seed buffers joined in seed order, and the digests are the same across SEQ, OpenMP and TBB at any thread count.
On a volume the lines are inside it, hidden by the skin, so combine them with a cut-away (--cutaway +x:0.5) to see them. In the viewer :streamlines NAME turns them on and :streamlines none off; they are a prepare-time option, so changing them re-prepares the scene once and an orbit afterwards costs only a redraw. With no array named a frame is byte-identical to one rendered without the option.
The synthwave theme
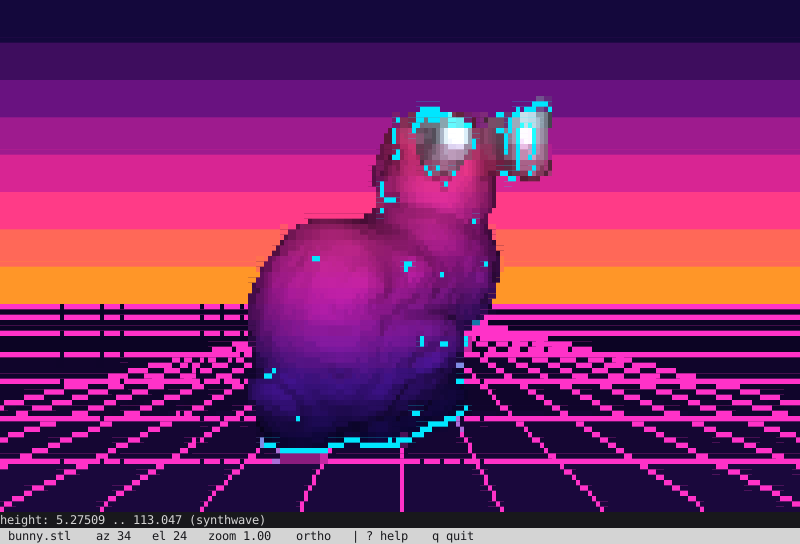
--theme synthwave --grid-floor --color-by height --bloom on a screen of 100 columns, the sextant encoding. The sunset, the grid and the violet-to-pink colours are all drawn by the rasterizer; the picture is a replayed session, like the other screenshots.
An optional 1980s look (v16.38.0), and a joke taken seriously: nothing about it is a default, it adds no dependency and it touches no mesh operation. --theme synthwave (theme="synthwave" in Python, :theme synthwave in the viewer) does four things:
- A sunset behind the model, wherever the frame is not opaque: dark violet to hot pink to orange down to a horizon at 60% of the height, then a dark floor, each in a fixed number of bands (eight above the horizon, four below) so it survives 16- and 256-colour terminals. An opaque
--backgroundof your own wins. - Neon defaults. Faces left at their default fill become violet, edges cyan and lines magenta; any colour you set is kept. With a mapped field the default colormap becomes
synthwaveunless you name one (--cmap viridisstays viridis). --grid-floor, a perspective grid under the model, drawn behind it by the rasterizer. Its colour alternates between magenta and cyan, and its lines scroll one eighth of a cell, with the theme's phase, a beat counter (below).- Post-processes, each its own flag, off by default and usable without a theme:
--bloom(the brightest pixels, box-blurred and added back),--fringe(red and blue shifted apart by a pixel or so) and--scanlines(every other row dimmed by a quarter), applied to the final frame in that order.
| Option | Meaning |
|---|---|
--theme NAME / theme | synthwave, or none |
--grid-floor / grid_floor | the grid under the model; it needs a theme |
--bloom, --fringe, --scanlines | the post-processes |
--pulse, --reduced-motion (tui) | step the theme's phase on every beat of --tempo; never, whatever else is asked |
Everything is integer arithmetic in a fixed order, so the theme is as deterministic as the rest of the renderer: the same options give the same bytes on every backend and thread count, and with the theme off a frame is byte-identical to one rendered before it existed (the render_frame_* rows of the benchmark harness are unchanged). The picking buffer is not touched, so probing works under a theme. The synthwave colormap is generated by tools/gen_colormaps.py, an original palette through deep blue, violet, magenta, hot pink and pale cyan; it is not perceptually uniform, so it is for the look and not for anything quantitative (viridis stays the default).
The beat. With a theme and --pulse (or --music, which implies it) the viewer counts beats from the clock it is given, at the tempo of the soundtrack (100 BPM unless --tempo says otherwise), and redraws once per beat with the new phase. The tempo is capped at 140 BPM, so the picture changes at most 2.3 times a second, under the three flashes a second that accessibility guidance for photosensitive viewers asks content to stay below (†, from memory: check the current WCAG wording before relying on it), and a step moves the grid by an eighth of a cell and swaps two neon colours, never the whole frame to white. --reduced-motion, or the REDUCED_MOTION environment variable set to anything but empty, 0 or false, turns the pulse off entirely; the frames are then still. Because the clock is the loop's own (a replayed session supplies a deterministic one), a recorded .cast or a replay reproduces.
The theme reaches the native and Python snapshot and tui, the Python library (render_image, render_text, snapshot) and the Snapshot pipeline step (Theme, GridFloor, Bloom, Fringe, Scanlines). C, Fortran, Julia, R and WebAssembly get the synthwave colormap by name and nothing else: their option structures did not grow, and an agent has nothing to hear, so there is no MCP entry either.
Surfaces
The rasterizer is reachable from every language the library has, with the same options and the same pixels:
| Surface | Entry points | See |
|---|---|---|
| native CLI, Python CLI | snapshot | CLI |
| Python | render_image, render_text, snapshot (core only) | below |
| MCP | render_mesh | MCP server |
| C | mio_render, mio_frame_*, mio_render_text, mio_write_snapshot | C API |
| Fortran | mio_mesh%render, %render_text, %write_snapshot, mio_frame | Fortran |
| Julia | render, render_text, render_png, write_snapshot | Julia |
| R | mio_render, mio_render_text, mio_render_png, mio_write_snapshot | R |
| WebAssembly | render, renderText, renderPng (cell encodings only) | WebAssembly |
| settings pipeline | the Snapshot step | pipeline |
The interactive loop and the graphics-protocol encoders are CLI features: the library carries frames, text and PNG, never a tty. The Snapshot pipeline step writes a frame as a side output after any step, with the mesh passing through untouched, so a Smooth or Decimate can be shown before and after in a report.
The interactive viewer (tui)
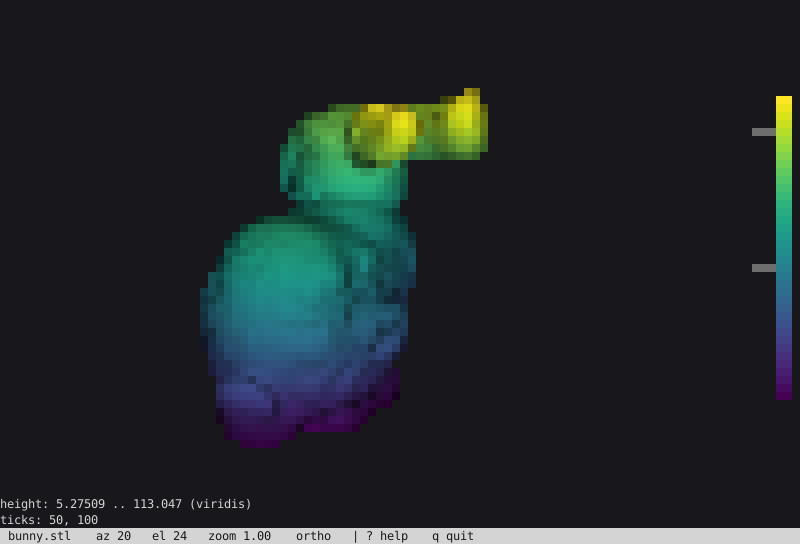
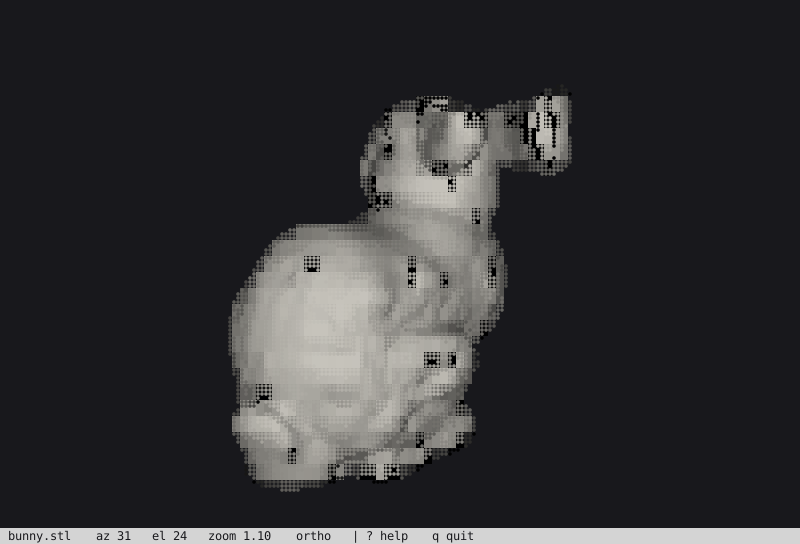
meshioplusplus tui bunny.stl --color-by height --colorbar --shading smooth after a mouse drag, in a 100 x 34 terminal. This and the other figures on this page are generated by replaying a recorded input stream (tools/gen_doc_images.py), so they show exactly what the viewer writes.
tui takes over the terminal and lets you look around a mesh with the mouse and the keyboard. It is the viewer for a machine with no display: nothing to install, no GPU, no X forwarding.
meshioplusplus tui part.vtu
meshioplusplus tui result.vtu --color-by temperature --colorbar --cmap magma --edges feature
meshioplusplus tui part.vtu --encoding braille --color-depth 256 # a plainer terminalimport meshioplusplus as mio
mio.tui(mio.read("part.vtu"), color_by="temperature") # returns when you quit
mio.view(mesh, backend="terminal") # the same viewer through view()It takes the render flags of snapshot (--color-by, --cmap, --edges, --shading, --view, …), plus --encoding, --color-depth, --cell-aspect and --tmux; the size of the picture is the size of the terminal.
Keys and mouse
| input | does |
|---|---|
| drag with the left button | orbit: a drag across the whole width turns the camera 360°, down the whole height 180° |
| drag with the right button, or shift-drag | pan |
mouse wheel, + -, Page Up / Page Down | zoom |
| arrow keys | pan |
1 … 7 | the views iso, +x, -x, +y, -y, +z, -z |
p | switch between orthographic and perspective |
e | edges: off, all, feature (re-prepares the scene) |
s | shading: flat, smooth, none (smooth re-prepares the scene) |
a b c | the axes, the scale bar and the colour bar |
| click (press and release without moving) | probe the cell under the pointer |
i, 0 | pin the probe (two pins show their difference); clear the probe, the pins and the cut-aways |
x y z, , . | cut away half the model at the middle along an axis (once: keep the + side, twice: the − side, third time: off); slide the plane |
[ ], { }, space | step through a series by one or ten; play and pause |
m, < > | mute or unmute the soundtrack; lower or raise its volume (nothing happens without --music) |
: | the command line |
r, Home | reset the camera (the cut-aways go; the field, edges and shading stay) |
? | show or hide the help |
q, Escape, Ctrl-C, Ctrl-D | quit |
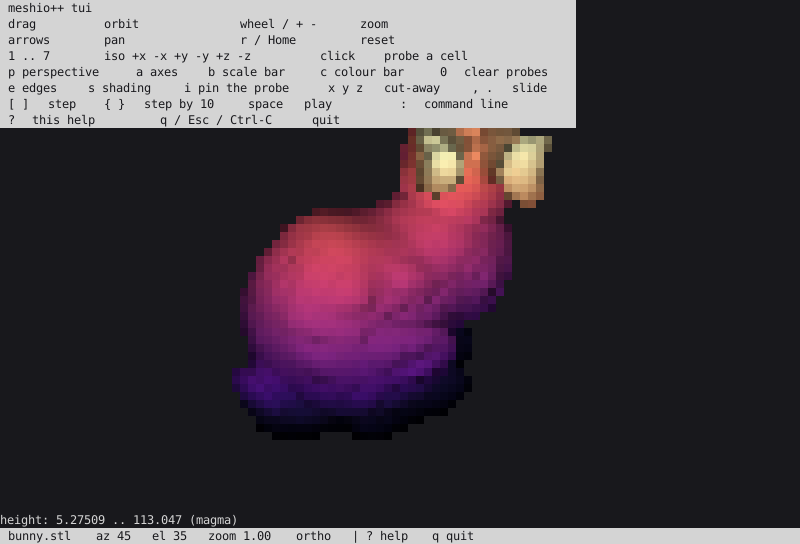
The status line shows the camera (az, el, zoom, the projection) and the last thing you changed; the lines above it are the notes of the frame (the colour range, ticks and keys), as in snapshot.
What it does for you
- The mesh is prepared once. The boundary skin of a volume, the field and its range, the normals and the edge lines do not depend on the camera, so the viewer builds them when it starts (
prepare_render) and every frame after that is only the projection and the raster. At tier XL, where the skin costs seconds, this is the difference between a viewer and a slideshow. Toggling edges, or smooth shading for the first time, prepares again, and says so. - The model keeps its size. The frame is fitted to the bounding sphere of what is drawn, not to the projected extents, so the object turns in place instead of growing and shrinking as it rotates.
- Only changed cells are sent. Each frame is compared with the last (cell by cell, as the chosen colour depth shows them) and only the differences are written, with cursor addressing, in one write. That keeps an SSH link usable.
- The terminal is always given back. Raw mode, the alternate screen, the hidden cursor, mouse reporting and bracketed paste are undone on a normal quit, on an error, on
SIGINT,SIGTERMandSIGHUP(the viewer sees the signal within 50 ms and leaves cleanly, exiting with 128 plus the signal number), and atexit. OnlySIGKILLcannot be undone;resetfixes that. A second signal while the first is being handled restores the terminal on the spot. - It refuses to guess. With standard input or output not a terminal it stops with a message naming
snapshot, which draws one frame to a file or a pipe, and changes nothing. - Resizing refits.
SIGWINCH(or, on Windows, a size poll) redraws at the new size; a picture is never larger than the screen, and a screen too small for a picture says so.
The final frame at rest is the deterministic one: the same camera gives the same cells whatever path led to it.
Choosing the encoding
--encoding is the same set as for snapshot. halfblock (the default) is the portable choice; quadrant, sextant and braille pack more detail per cell and need a font that has the glyphs; ascii works anywhere. The graphics protocols (kitty, iterm2, sixel) redraw the whole image on every change, so they suit a local terminal rather than a slow link. Inside tmux they need --tmux (and set -g allow-passthrough on), and the viewer refuses by name otherwise.
Probing a cell
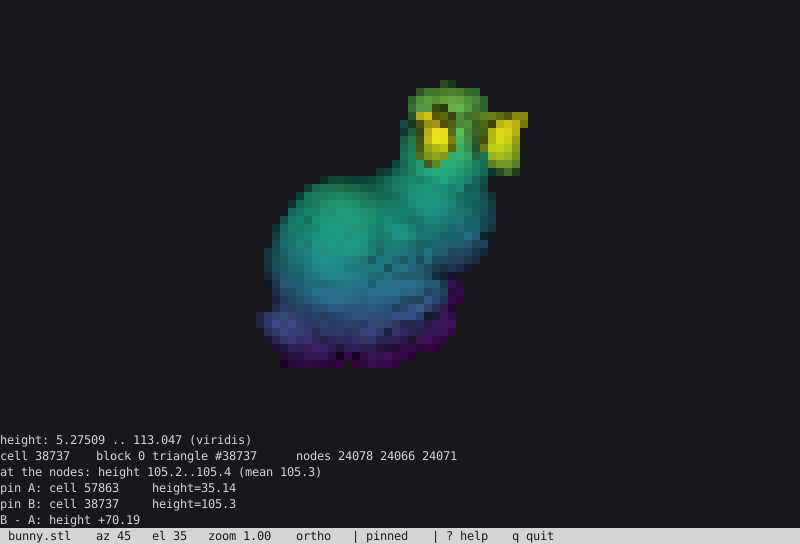
Two clicks on the bunny, each pinned with i: the lines under the picture are the probe (the cell, its block and type, its node ids, the cell data there and the point data across its nodes, and any named region that holds it), then the two pins and their difference.
The id buffer of a frame names the input cell drawn at each pixel (global, block-major), so a click on a cell of the picture is a lookup, not a pick: the pixels of the cell under the pointer are read, the first drawn one is taken, and probe_cell reads the mesh at that cell. For a volume mesh it is the volume cell that owns the visible face (the skin remembers its parent). A click on the background says so. A drag is never a click: the viewer tells them apart by whether the pointer moved between the press and the release.
Pinning keeps the numbers: a pin shows the cell and up to four of its values, and with two pins the last line is B − A over every name they share (cell data as is, point data as the mean over the cell's nodes, a vector array as its magnitude). Probing a comparison probes the pane that was clicked.
The command line
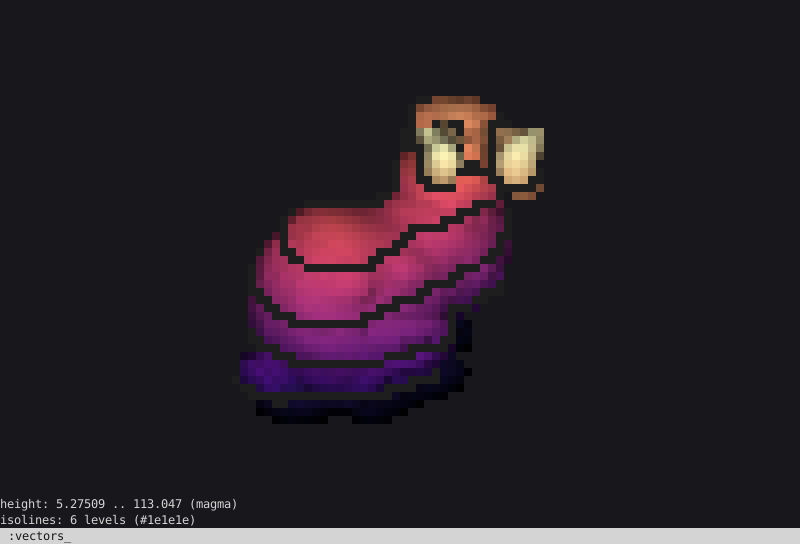
: opens a prompt on the status line (:cmap magma, Enter runs it, Escape or Ctrl-C cancels, Ctrl-U clears). A command is a flag of snapshot spelled without the dashes, so there is one vocabulary: :cmap turbo, :edges feature, :isolines 6, :vectors disp, :warp disp, :scale log, :diagnostic quality, :zoom 2, :axes (a boolean flag toggles, or takes on/off). The state is kept as flags: a command takes the current options as flags, changes one, and derives the options again, so everything snapshot validates is validated here, and a bad command (a :cmap with no field mapped, an unknown colormap) is a message on the status line and changes nothing.
A few commands have their own meaning:
| command | does |
|---|---|
:color NAME / :color none | colour by a data array; :unset FLAG removes any flag |
:range LOW HIGH, :range auto, :range lock | an explicit range; each frame its own; keep the range of the first frame shown (a series does by default) |
:view NAME | iso, +x, -x, +y, -y, +z, -z |
:clip AXIS OFFSET, :clip off | a cut-away (:clip +x 0.5 keeps x ≥ 0.5; --clip itself is the percentile range, so :clip is the cut-away here) |
:w FILE | write what is on screen with snapshot's writers: .png, .txt, .ansi, .html, .cast |
:session save FILE, :session load FILE | sessions |
:step N, `:step next | prev |
:pin, :probe off | pin the probe; clear probes |
:reset, :help, :q | as the keys |
Cut-aways
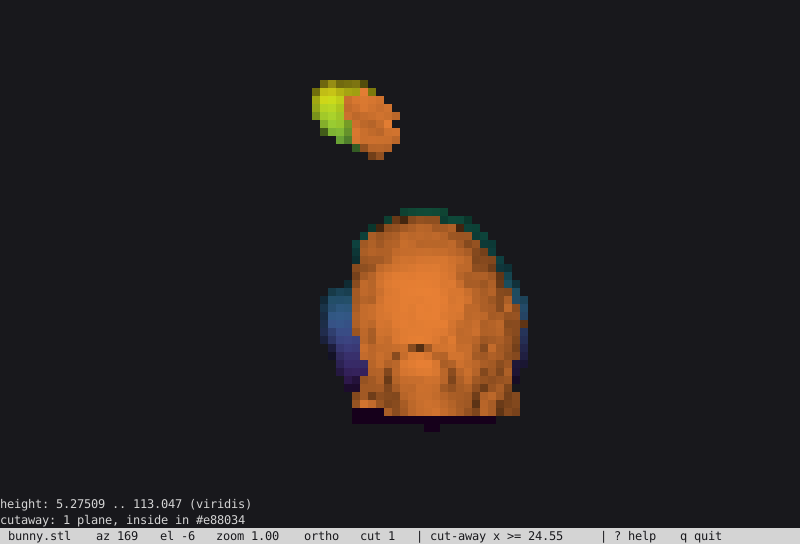
x once, then , twice: the plane keeps x ≥ 24.55 and the camera looks at the cut from the −x side. The inside, the back faces now in view, is orange.
A cut-away clips the drawn geometry against up to two planes (--cutaway PX,PY,PZ,NX,NY,NZ or --cutaway AXIS:OFFSET, a point and the normal of the side kept; -x:0.5 keeps x ≤ 0.5). A face a plane crosses is cut in two and keeps its colour, its id and its smooth shading (the normals are interpolated along the cut); lines and points on the far side are dropped. A cut surface is hollow, so the back faces now in view, those turned away from the camera, are drawn in --cutaway-tint (default orange) and the inside reads as inside. No cap is built.
The cut is a draw-time option: the prepared scene is untouched, so sliding the plane with , and . costs only a redraw, and a frame with no plane is byte-identical to one rendered before cut-aways existed. The frame stays fitted to the whole model, not to what is left, so the part you keep does not change size or place when you cut. The same option is cutaway= in Python ("+x:0.5", six numbers, or a list of up to two), cutaway in the Snapshot pipeline step (a flat list, six numbers per plane), render_mesh's cutaway and cutaway_tint, and a field of the C, Fortran, Julia, R and WebAssembly render options.
Comparing two meshes
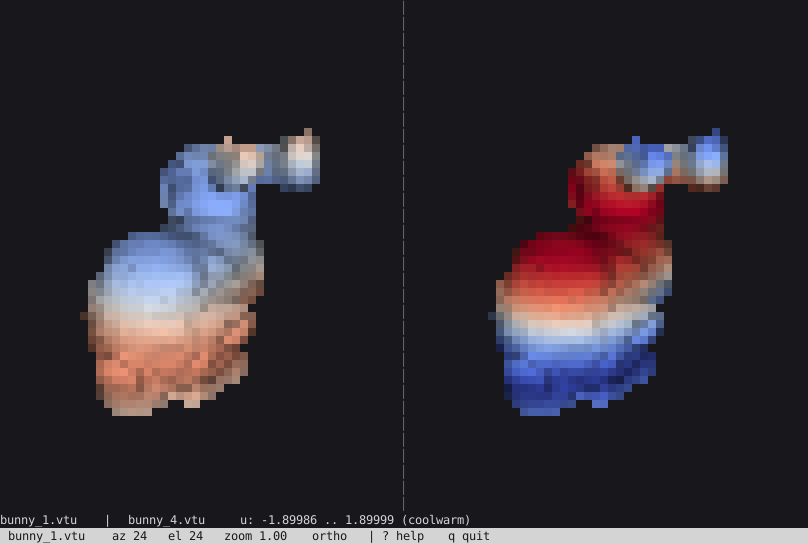
meshioplusplus tui a.vtu --compare b.vtu draws the two meshes side by side under one camera (an orbit moves both) and one colour range, so the same colour means the same value in both; --separate-ranges gives each its own. --diff replaces the right mesh by |B − A| of the --color-by point array, node by node (the two meshes must share their nodes, and each must have the array; the difference is drawn with magma). A click probes the mesh under it. Comparing needs a cell encoding, not a graphics protocol.
Time series
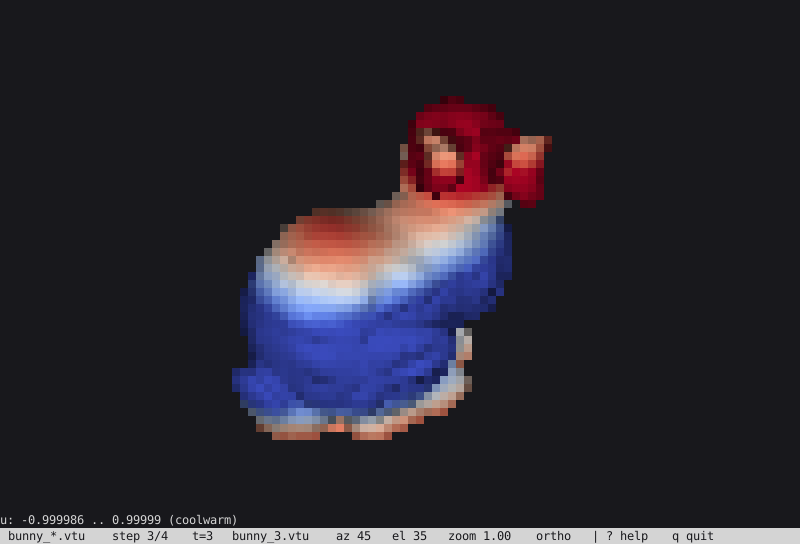
Several files, or a quoted glob ('out_*.vtu', natural-numeric order), make a series: meshioplusplus tui 'out_*.vtu' --color-by u. The viewer holds one step at a time, as the library's sequence machinery does, so a 500-step dataset is browsable on a laptop. [ and ] step, { and } step by ten, :step N jumps, and space plays at --fps steps per second (default 4) and stops at the last. The colour range is fixed from the first step shown, so colours do not jump while stepping; :range auto lets each step choose its own.
--follow watches a run that is still writing (--follow-interval MS, default 500): the viewer looks at the newest file's name, size and modification time, waits until that stops changing for --settle ms (default 300), then reads it and shows it. A reader that throws on a half-written file is expected, not fatal: the last good picture stays up with a message, and the read is retried. --follow on a single file reloads it each time it is rewritten. Modification-time polling is the whole mechanism (no inotify or kqueue), which works on every platform and over network file systems.
Sessions
--session FILE reads a session if the file exists and writes it when the viewer ends; :session save FILE and :session load FILE do it on demand. A session is strict JSON with sorted keys and a version:
{
  "flags": [
    "--azimuth=33",
    "--cmap=magma",
    "--color-by=u",
    "--cutaway=0.5,0,0,1,0,0",
    "--edges=all",
    "--zoom=2.5"
  ],
  "step": 0,
  "version": 1
}
The flags are the camera, the field, its range and scale, the cut-aways and everything else snapshot takes, as the tokens it parses, so a session can also be pasted onto a command line. An unknown key, a wrong type or another version is an error naming it, and a session that makes no sense for the mesh stops the start with a message instead of starting somewhere else. The reader is a small hand-written one for exactly this shape, so the viewer does not depend on the optional JSON library.
The soundtrack
--music plays a generated loop while the viewer runs (v16.38.0): a slow minor-key chord progression on detuned sawtooth pads under a gentle low-pass sweep, a sine bass on the root, a soft arpeggio on a quarter-width pulse wave, a kick on every beat, a noise hi-hat on the off-beats and a dotted-eighth feedback delay, 8 bars of 4 beats at 100 BPM by default (about 19 seconds, looped). It is original and generated: nothing is sampled, copied or modelled on an existing piece, and no audio file ships with the library.
The synthesizer (detail/synth.*, core-private, no public header and no ABI) is a pure function of its options, computed entirely in integer arithmetic on phase accumulators: the waveforms come from the accumulators' top bits, the sine is a fixed-point polynomial, the filter is a one-pole integer low-pass and the noise is an xorshift generator, so no floating-point value or libm call touches a sample. The same (seed, tempo, key, length) gives the same WAV bytes on every compiler, platform and optimisation level (a checksum of the default loop is pinned in the tests, which also check the sample count, that the peak follows --volume and stays below full scale, and that the loop's first and last samples join without a step). The seed picks the chord progression (four of them), the arpeggio order and the bass pattern.
| Option | Meaning |
|---|---|
--music | play the loop on an external player |
--music-out FILE.wav | write the loop for your own player; no player is needed, and it works over SSH and in CI |
--volume V | the loop's loudness as a fraction of full scale, 0.05 to 0.9 (default 0.3); baked into the samples, so it is the same on every player |
--tempo BPM | 60 to 140 (default 100); also the pulse's tempo |
--music-seed N, --music-key K | the variation, and the tonic (C, C#, Db, ... B, or 0 to 11; default A) |
--music-over-ssh | play even in an SSH session |
Players. No audio library is linked. The loop is written to a temporary WAV file and played by the first of afplay (macOS), paplay, pw-play, aplay -q, ffplay -nodisp -autoexit -loglevel quiet found on the PATH (on Windows, PowerShell's System.Media.SoundPlayer), started as a child process, restarted when it ends and killed on every way out the process controls: a normal quit, an exception, SIGINT, SIGTERM and SIGHUP, atexit, and even SIGKILL of the viewer on Linux (the child asks the kernel to kill it with its parent). With no player found --music says so, naming what it looked for, and the viewer goes on silently. m mutes, which stops the player, and < > change the volume, which writes the loop again and restarts it.
Manners. Sound is off unless asked for: no environment variable, configuration file or auto rule turns it on, and snapshot has no music at all. --music is refused, with the reason, when CI is set, and in an SSH session unless --music-over-ssh is given: the music plays on the machine the process runs on, not where the terminal is, which over SSH is somebody else's speaker. A replay never plays.
What was verified. The four Linux players (paplay, pw-play, aplay, ffplay) accept the generated file with the arguments above, checked here by starting each on a generated loop. The pty tests run the real viewer against a fake player and check that it starts, that muting stops it, and that every exit path, a quit, three signals and an outright SIGKILL, leaves none behind. Not verified: afplay on macOS and the PowerShell player on Windows (these come from their documentation, and the Windows child is not tied to the terminal's signal restore as the POSIX one is).
Prepared scenes
The library exposes the cached half as prepare_render(mesh, options) and render_scene(scene, options, fixed_fit) in operations/render.hpp (and render_scene_bounds, the bounding sphere the cut-away keys centre on): prepare_render fixes the field, edges, colours and shading mode; render_scene takes the camera, the frame size, the lighting and the overlays. With the same options the frame is byte-identical to render's, which a test checks across cameras, fields, vectors, warps, diagnostics and supersampling. encode_cells and encode_cells_update give the cell grid and the bytes that repaint one grid over another. They are what the viewer uses, and available to anyone writing their own loop; the loop itself, with its raw mode and signal handling, stays in the command-line layer.
Replaying a session
For tests and documentation, --replay FILE plays a recorded input stream on a --cols by --rows screen instead of a terminal and prints everything the viewer wrote. tui(mesh, replay=bytes, cols=…, rows=…) does the same from Python and returns the output with the final camera. The figures on this page, and the viewer's own tests, are made this way: the bytes are decoded by tools/ansi_screen.py, a small terminal emulator that turns them into a screen to assert on, or into an SVG.
Windows
The viewer asks the console for virtual-terminal input and output with SetConsoleMode (ENABLE_VIRTUAL_TERMINAL_INPUT and ENABLE_VIRTUAL_TERMINAL_PROCESSING), sets the code page to UTF-8 for the session and restores all of it on the way out; a console that refuses either flag gets a message naming snapshot. Microsoft documents what the console emits for keys in that mode (the arrow keys, Home and End, Page Up and Down, Insert, Delete, the function keys, Ctrl and Alt), which is what the key parser reads. That page says nothing about mouse reports, so mouse input on Windows is not verified: Windows Terminal is expected to forward the SGR mouse mode, the legacy console host may not, and the keys and the wheel-less + - zoom work either way.
This path is built and smoke-tested in CI, but a runner has no console to drive, so it has not been exercised on a real one. Please report what you see on Windows.
Screenshots without a viewer
screenshot() needs Polyscope and EGL or a virtual framebuffer. Without Polyscope it now falls back to this rasterizer, with a warning, and the screenshot verbs of both CLIs do the same. The native release binaries, which exclude Polyscope, therefore write a PNG instead of reporting a build flag, and their view error points at snapshot.
Determinism
A frame is a pure function of the mesh and the options: the same pixels from the native CLI, Python, every parallel backend and every thread count. The rules that make it so:
- Screen positions are rounded once to fixed point with 8 subpixel bits, so coverage is decided by exact 64-bit integer edge functions. A pixel centre exactly on an edge belongs to the triangle for which that edge is a top or left edge, so two triangles sharing an edge never both claim, or both miss, a pixel.
- Depth and shading are interpolated in double precision from those integers in a fixed expression order. The whole core is compiled with
-ffp-contract=off, so no fused multiply-add changes a rounding between compilers. - The depth test is strict: on a tie the primitive drawn first keeps the pixel, and primitives are drawn in block-major order (triangles, then lines, then points).
- The frame is cut into 32x32-pixel tiles, each owned by one worker; there is no shared write to order.
- Supersampling is resolved by an integer box filter in a fixed order, and the text encoders break ties in a fixed order too.
The operation-determinism check (tools/bench_ops.sh … --hash, see benchmarks) holds the rasterizer to this through its render_frame_160x96 and render_ss4_800x480 rows, which hash both the pixels and the id buffer.
Python and MCP
render_image(mesh, width, height, **options) returns the (H, W, 4) uint8 image; return_info=True adds cell_ids (an (H, W) array of the input cell drawn at each pixel, global block-major, -1 for none), the mapped range and the notes. render_text(mesh, cols, rows, encoding, color_depth, format, **options) returns the text, sized to the terminal by default; format is ansi, plain or html. snapshot(mesh, path, **options) writes any of the forms above. They need the compiled core: there is no pure-Python rasterizer, by decision (see below), so without _core they raise NotImplementedError.
The MCP server's render_mesh tool lets an agent look at a mesh: without an output path it returns plain text, with a .png path an image. The interactive tui is deliberately not a tool: it hands the terminal to a person.
Design decisions
These were settled before the rasterizer was written, and recorded in the roadmap while it was open.
Frame budget. Measured with the render_frame_160x96 (a terminal-sized frame of the tier's volume) and render_ss4_800x480 (a 4x-supersampled 800x480 image of the same volume with smooth shading, every edge and a mapped field) rows of the benchmark harness, on four OpenMP threads of a 16-core machine:
| tier | cells | 160x96 | 4x supersampled 800x480 |
|---|---|---|---|
| M | 162,000 | 21 ms | 50 ms |
| L | 750,000 | 103 ms | 144 ms |
| XL | 10,368,000 | 3.4 s | 3.6 s |
At XL both rows cost about the same although the second draws 400 times as many samples, so what they measure is the boundary-skin extraction, not the raster: a frame of a few tens of milliseconds is already inside the budget of an interactive loop. The consequence for the interactive loop is that the skin (and the triangle list built from it) is extracted once per mesh and cached, and that a coarser draw while the camera moves buys nothing at these sizes: the tile rasterizer needs no spatial structure, since a primitive costs only the tiles it touches. Whether a coarse draw helps on a much slower terminal link is a question about output, not rendering, and belongs to the loop.
No Python twin. Every other renderer in meshio++ (SVG, TikZ, glTF) has a byte-pinned NumPy twin. This one does not: a NumPy edge-function rasterizer would be slow and would double the surface that has to stay byte-identical. Python calls the core or raises by name, the precedent of remesh_volume and the MMG operations; MESHIOPLUSPLUS_STRICT_CORE and the core-fallback guards are unaffected because there is no fallback to take.
Nothing beyond the standard library and the operating system. No curses, image or terminal library. The PNG encoder, the colour quantizers, the Sixel median cut and the asciicast writer are all part of the core. The terminal itself is queried only by the CLI layer, through ioctl(TIOCGWINSZ) on POSIX and the console API on Windows. On Windows the CLI turns on ENABLE_VIRTUAL_TERMINAL_PROCESSING and the UTF-8 output code page; virtual-terminal processing needs Windows 10 version 1511 (build 10586) or later, and the interactive loop also needs virtual-terminal input, for which Microsoft's documentation gives no version (the viewer asks and, if the console refuses, says so). On an older console snapshot - falls back to glyphs without colour.
No audio library. The soundtrack is synthesized by the core in integer arithmetic and played by whatever player the system has, as a child process the viewer owns. Linking an audio library would add a dependency for a joke; a player on the PATH costs nothing and fails by name when it is absent.
Where the code lives. The public header is operations/render.hpp (RenderOptions, Frame, TextOptions, render, encode_text, encode_png, write_snapshot, …); the rasterizer, PNG encoder and text encoders are core-private (src/cpp/src/detail/raster.*, png_write.*, operations/render_text.cpp). Terminal queries live in the CLI (src/cpp/cli/terminal.*), so the library never owns a tty. The header is an additive ABI change, recorded in the ABI reviews.
Determinism. As above: 8 subpixel bits, integer edge functions with a top-left fill rule, a strict depth test, tile ownership and an integer box filter. A separate -ffp-contract=off for the rasterizer turned out to be unnecessary: the core is already built with it.
Limits
- No transparency, shadows or reflections; one directional light.
- The scale bar is drawn for the orthographic camera only.
- Screen coordinates are clamped to ±262,144 pixels, so an extreme zoom distorts geometry far outside the frame (never inside it).
- Streamlines are not drawn: they need a sampler and a step integrator. Vector arrows sit at the drawn points, not along a flow.
- Isolines are the piecewise-linear contours of the interpolant on each triangle (a quad is split on its shorter diagonal); they are not smoothed.
- The id buffer of a supersampled frame reports the cell at the centre sample of each pixel.
- A cut-away has no cap: the inside is the hollow back of the surface, tinted. Real caps are a follow-up.
- Probing reads the mesh the viewer was given; after
:warpthe cell is still the input cell, at its undeformed position. - The Kitty, iTerm2 and Sixel encoders are written to their specifications but are not tested against every terminal; the cell encodings are the portable choice.