
Opening a Preview
The raw text editor is the default for .mdpa and mesh files — the preview opens as a separate custom editor next to (or instead of) the text, so the file text is always one click away.
Four ways to open
- The Kratos sidebar — click the Kratos icon in the activity bar (VS Code's far-left strip). This is the only route that needs no file open at all; see The Kratos sidebar below.
- Editor-title button — open the file in the text editor, then click the preview icon in the top-right editor toolbar.
- Explorer context menu — right-click the file in the Explorer and choose Open MDPA Preview (for
.mdpa) or Open VTK Preview (for any mesh format). - Command Palette (
Ctrl+Shift+P/Cmd+Shift+P) — run Kratos MDPA: Open MDPA Preview or Kratos VTK: Open VTK Preview. Palette commands also cover Reset Camera, Toggle Node IDs, Compute Mesh Quality, Field Visualization, and Find Entity by ID for the active preview.
The Kratos sidebar
The Kratos icon in the activity bar opens a panel that works from a cold window — nothing has to be open first:
- Open Mesh File… — a file picker over every supported format; the pick opens in the matching preview.
- Open Empty Preview — brings up the preview window itself with an empty viewport, for when you want the tool up before choosing a mesh. It is a launcher: opening a file from it hands over to the ordinary preview and the empty window closes.
- Load Problem… — extract a
.kratosproblem.zipand open its mesh, edits and case setup (see Load problem… below). - Recent Meshes — the last ten meshes you opened, newest first. Click a row to reopen it; the inline ✕ forgets one and the title-bar button clears the list. Meshes that have since been moved or deleted drop off by themselves.
Kratos Runs — the list of tracked solver runs — appears here too while any run exists, alongside its usual home in the Explorer, so a solve can be watched without leaving the panel. See Running a Case.
A tour of the window
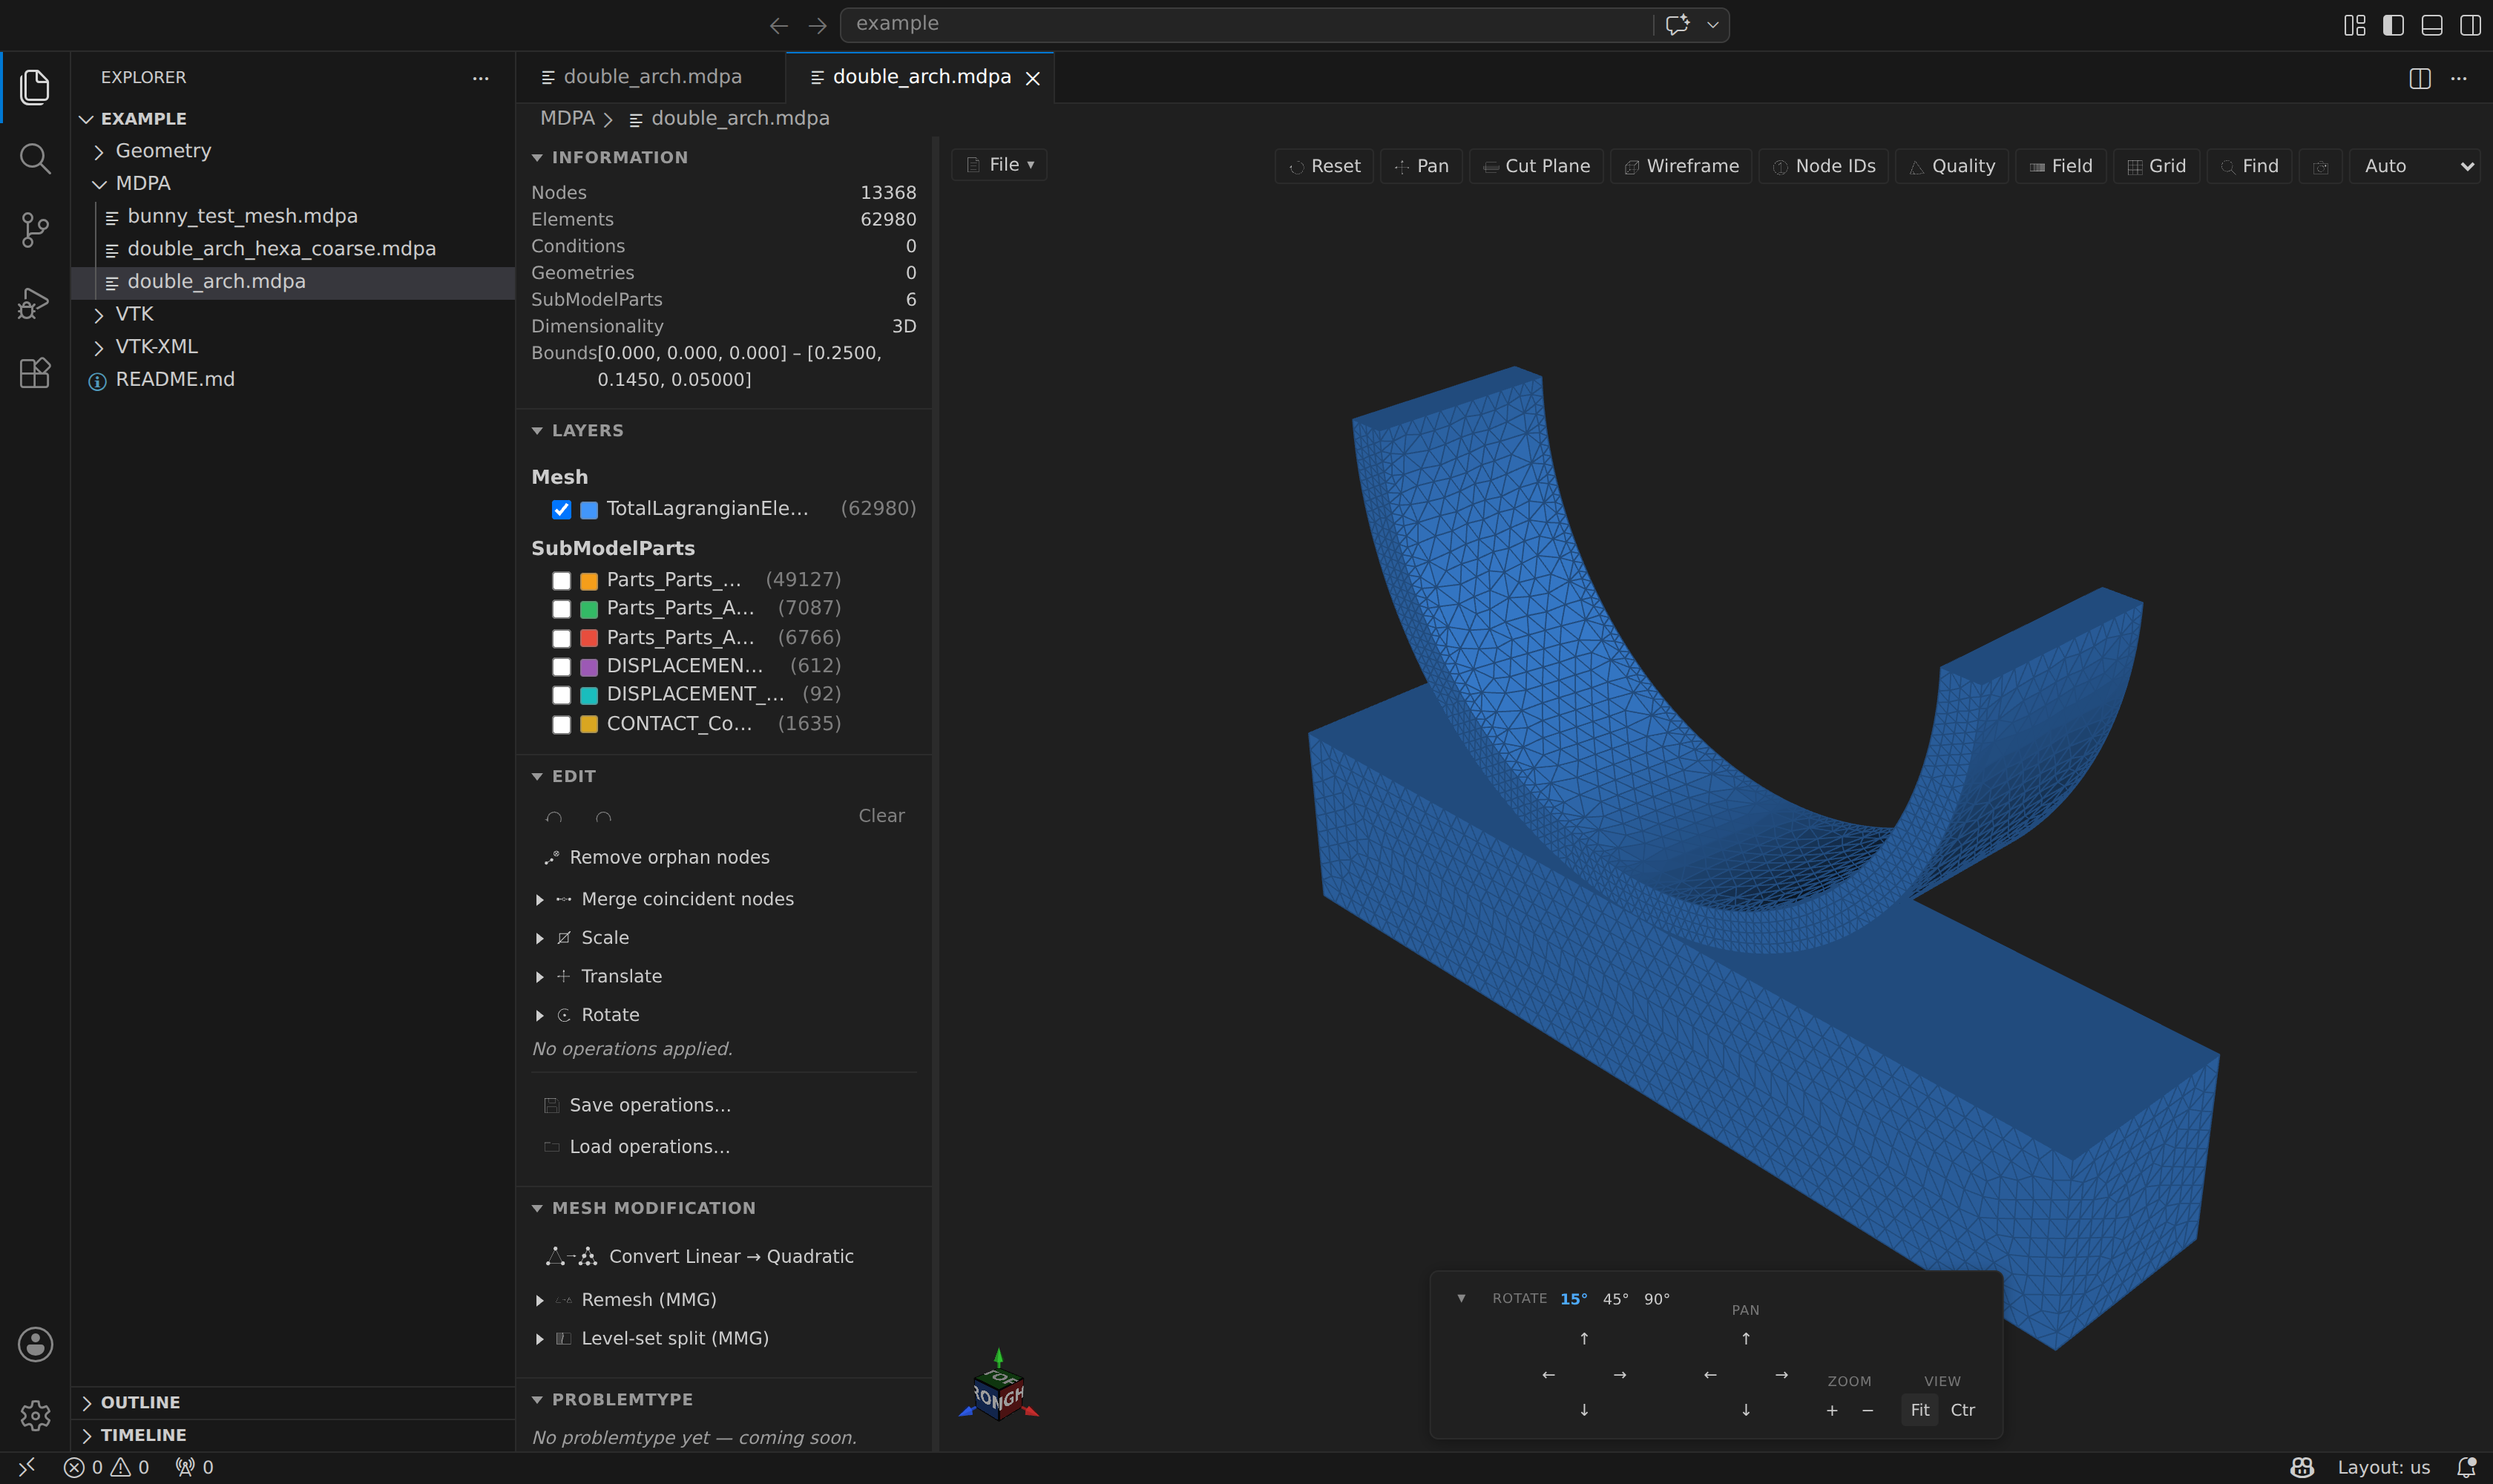
The window has three regions:
The sidebar (left)
A scrollable panel of collapsible sections, from top to bottom:
- Information — the stats panel: node / element / condition / geometry counts,
SubModelPartscount, detected 2D / 3D dimensionality, the mesh bounding box, and any element type names that could not be mapped to a drawable cell. - Layers — the outline tree: a Mesh group (one row per entity block) and a SubModelParts group (the full hierarchy), each row an independently toggleable layer.
- Edit and Mesh Modification — in-place mesh operations and an undoable history (see Mesh Editing & History and MMG Remesh & Level-set).
Drag the divider between the sidebar and the 3D view to resize the sidebar (clamped between 160 and 640 px); the viewport re-fits automatically.
The toolbar (top)
The toolbar sits across the top of the viewport (visible in the screenshot above). It holds six action buttons plus two menus:
| Button | What it does |
|---|---|
| Reset | Frame all visible geometry (reset the camera). |
| Pan | Toggle click-drag panning of the camera. |
| Quality | Open the mesh-quality panel. |
| Field | Open the field-visualization panel. |
| Find | Find an entity by ID. |
| Inspect | Turn clicks on the mesh into a probe (see Inspect). |
| View ▾ | Display toggles, split-view layout and capture (table below). |
| Advanced ▾ | Analysis panels and mesh utilities (table below). |
The View ▾ menu:
| Item | What it does |
|---|---|
| Node IDs | Overlay node-id labels (toggle; capped at 1 000 nodes). |
| Grid | Toggle a labeled bounding-box grid (toggle). |
| Edges | Toggle the mesh edge lines (toggle; on by default). |
| Level of detail | Draw a decimated surface in place of the full layers to keep a huge mesh navigable; the mesh is untouched and picking is off while it shows (toggle; see Simplify surface). |
| Layout | Single / Side by side / Stacked / Quad viewports (see Split View). |
| Screenshot… | Save the current viewport as a PNG (see Screenshot export). |
| Record… | Capture a WebM video or PNG sequence (see Video recording). |
The Advanced ▾ menu (all one-shot entries):
| Item | What it does |
|---|---|
| Mesh Size | Open the mesh-size panel. |
| Spheres… | Particle rendering for sphere/DEM meshes (see Sphere elements). |
| Beams… | 1D member rendering (see Beam elements). |
| Face normals | Arrow field plus inverted-element check (see Face normals). |
| Field integrals… | Integrated totals over the mesh and per part (see Field integrals). |
| Data table… | Every entity as a row, exportable to CSV/XLSX (see Data table). |
| Export skin… | Write the boundary skin to a new file (see Export skin). |
| Simplify surface… | Write a decimated copy of a triangle surface (see Simplify surface). |
| Sample to grid… | Write a voxel occupancy or a signed-distance volume of the surface on a regular lattice; a complete lattice can be a .vti (see Sample to grid) |
| Export partitions… | Write N per-part files with optional ghost layers and a manifest (see Export partitions). |
| Split mesh… | Write one file per connected body, element type or field value (see Split mesh). |
| Lighting… | Specular / ambient / diffuse sliders and backface culling (see Extras). |
| Camera Bookmarks… | Named views with JSON import/export (see Extras). |
The navigation dock (bottom-center of the viewport) holds three more groups, documented under Extras: Clip (interactive clipping plane), Display (Shaded / Wire, plus Edges in its ⋯ popover) and Persp/Ortho, with the scene theme and model opacity in the popover.
The File menu
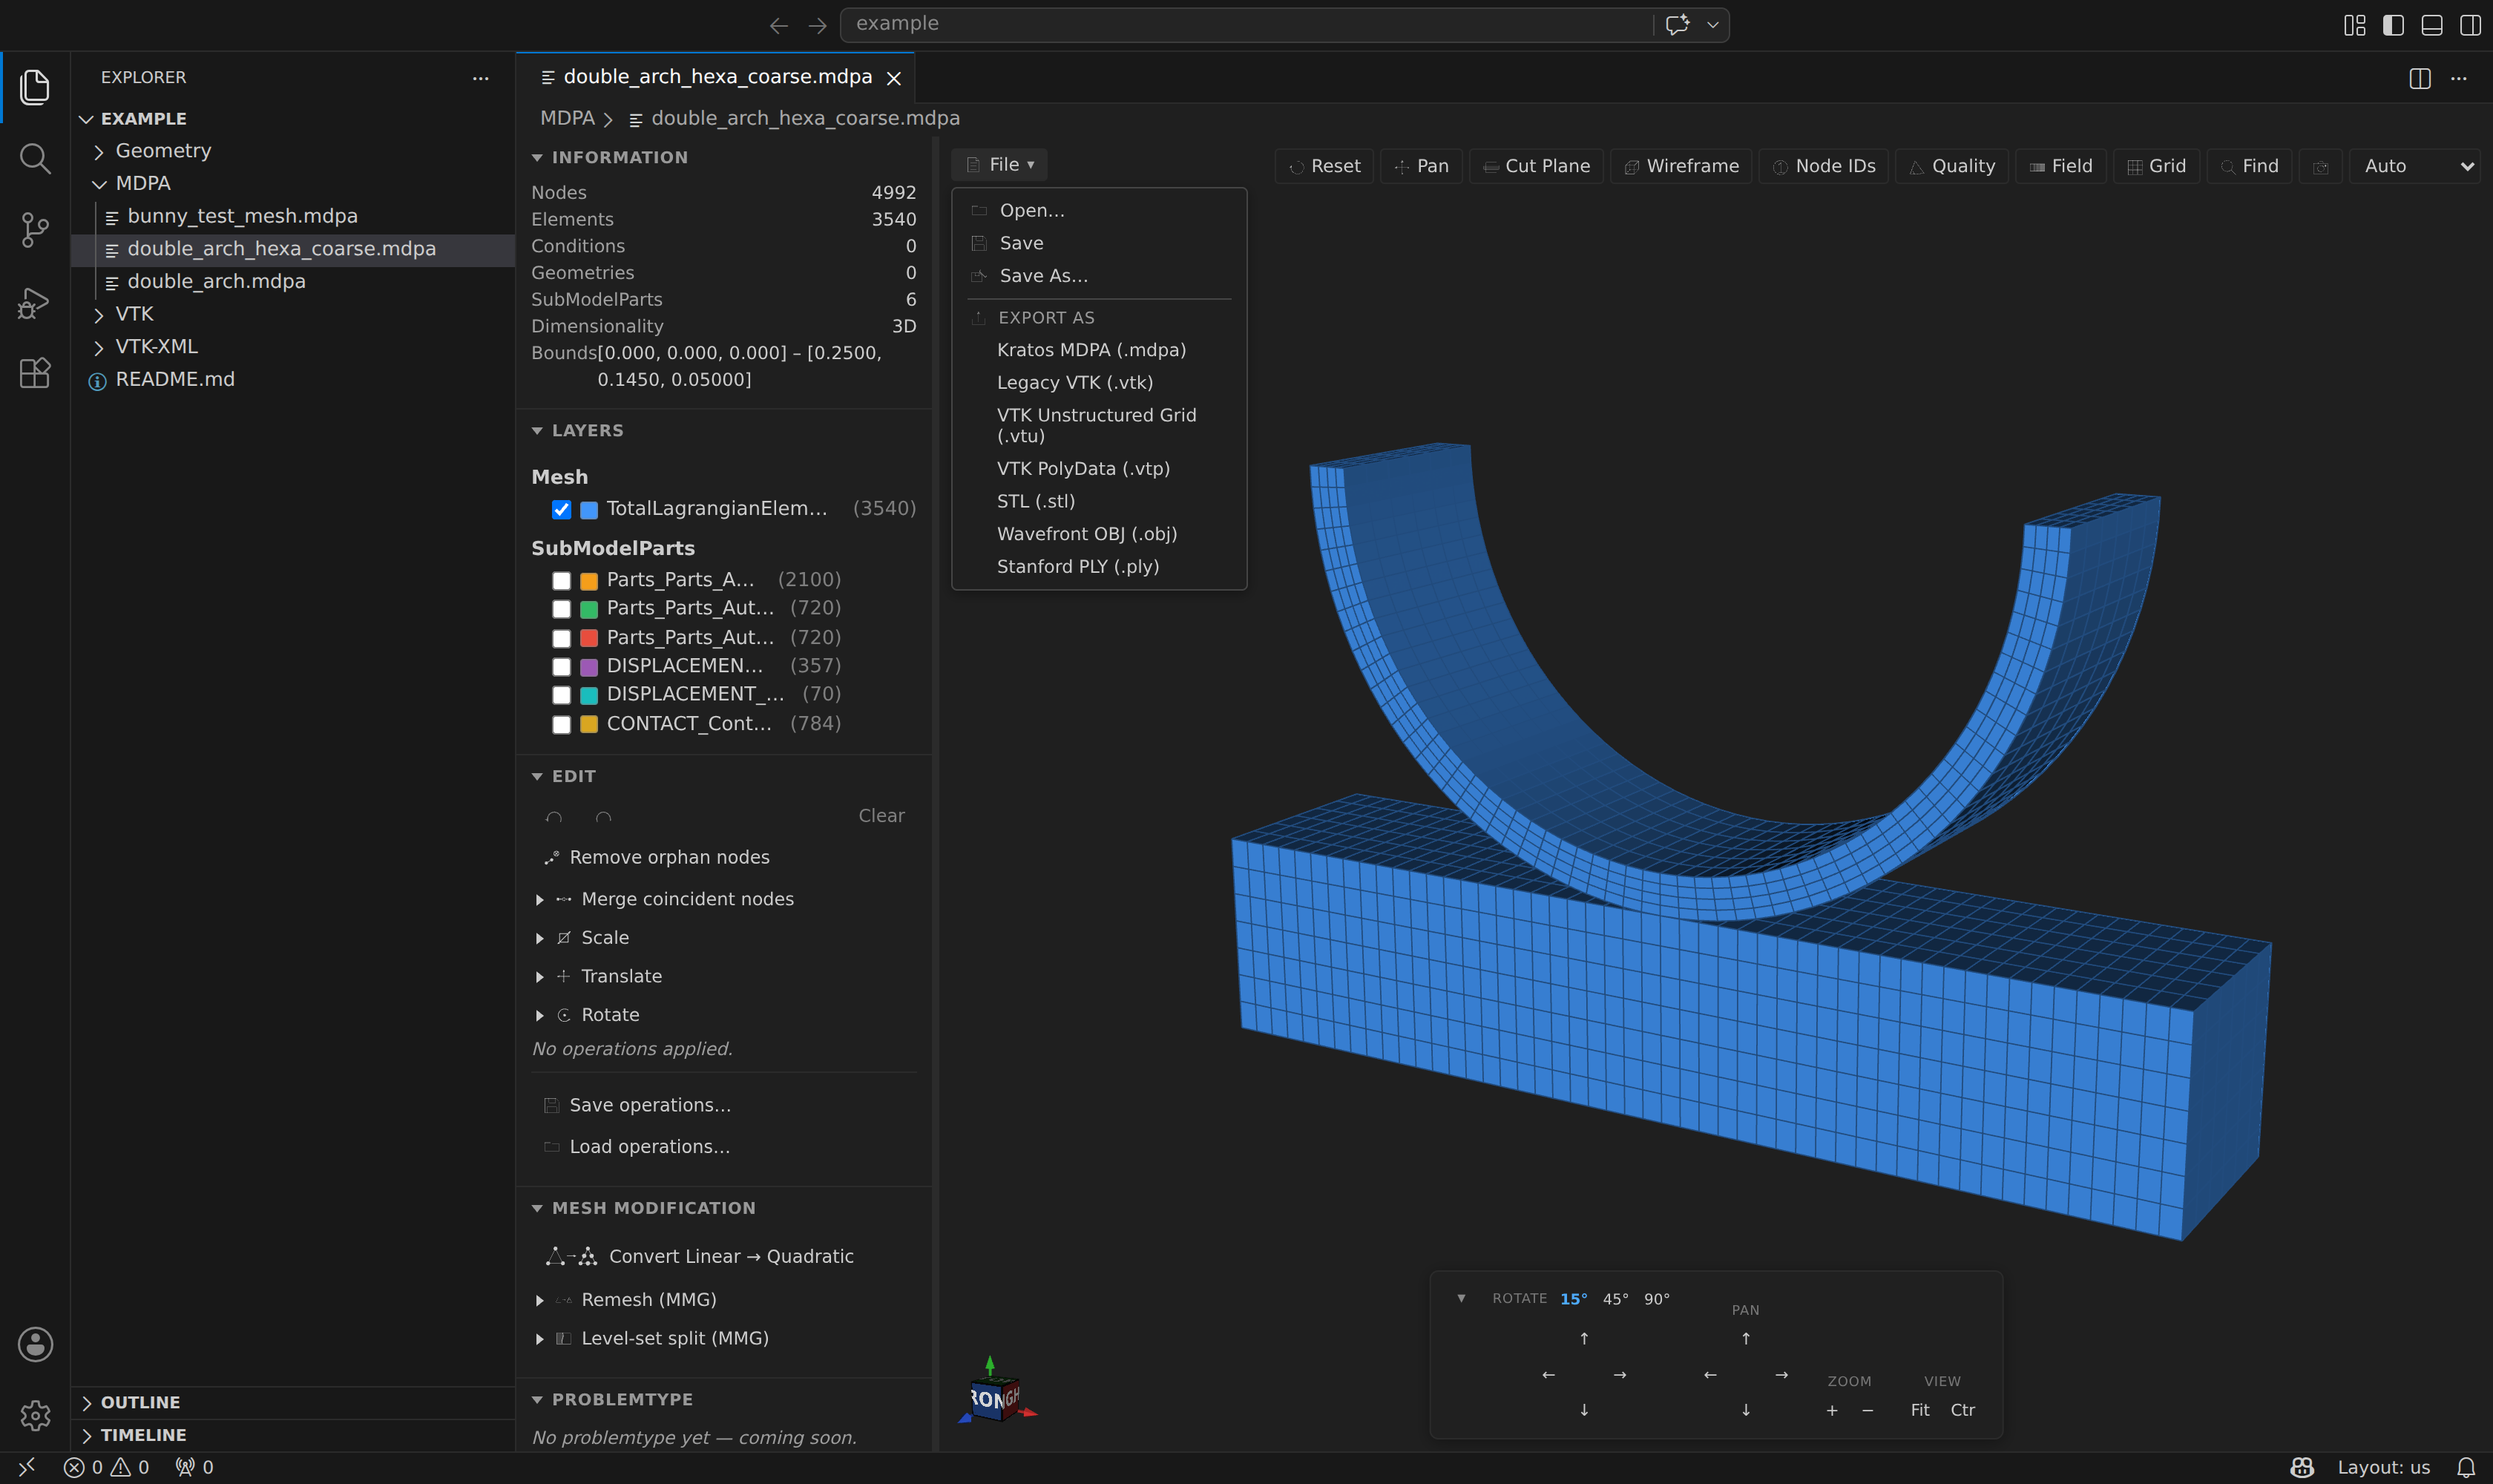
The File dropdown (top-left of the viewport) mirrors the kratos.mesh.* palette commands:
- Open… — open another mesh file in the matching preview.
- Save — re-serialize the (possibly edited) mesh back to its source format and overwrite the file (with a one-time overwrite warning).
- Save As… — write to a new file in the source format.
- Export ▸ — write the mesh to a different format, grouped by family: Kratos (
.mdpa), VTK (.vtk,.vtu,.vtp,.xdmf), Surface (.stl,.obj,.ply,.off,.wkt) and Solvers (.msh,.mesh,.inp,.bdf,.unv,.vol,.su2,.dat, and more via meshio++). - Save problem… — bundle the whole setup into one portable zip: the original mesh file, the applied edit operations as a recipe, the problemtype case state (
<name>.kratoscase.json) and the generated case files (ProjectParameters.json, the materials JSON,MainKratos.py,<name>_case.mdpa) — whichever exist. - Load problem… — extract such an archive into a folder of your choice; the mesh opens in the preview, the bundled edits are replayed automatically and the case setup is restored.
Everything you do in the Edit / Mesh Modification sections is what Save and Export write — the edited mesh, not the original file text.
The 3D viewport (right)
The rendered scene, with the always-on orientation cube and navigation controls in the corners. For time-series files a timeline bar appears along the bottom.